 |
4. Built-In and User Frame Options
|
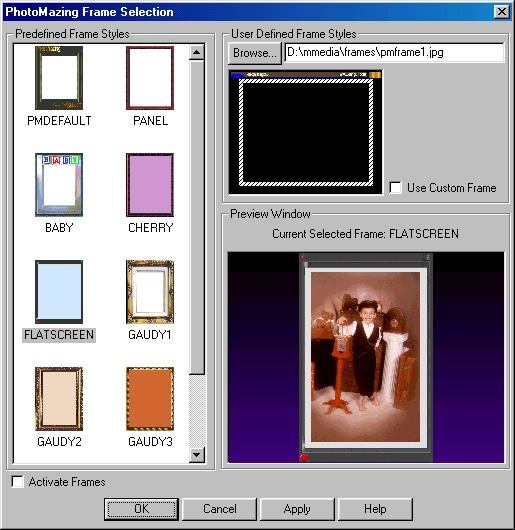
This dialog allows you to activate the PhotoMazing framing option and select from one of ten available frames. PhotoMazing will automatically re-size the frame or your image to fit your canvas or photo. You control this by selecting the Stretch Canvas or Stretch Frame options from the Canvas Layout dialog.
Preview Window
The preview window shows the current frame style and a sample photo or image. The preview layout will use one of the selected "built in" frames or your own custom frame selection if you have checked the Use Custom Frame box. Note: only registered users may use the custom frame option.
User Defined Frame Styles
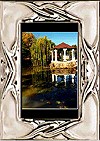
You may select your own custom frame to be used as a background image if you have checked the Use Custom Frame box. The exact photo layout is controlled by the configurable Rubber Band Box as shown below:
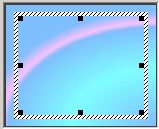
Use the resize squares to control the location and size of the image area to be framed by moving or dragging the cursor as needed. To see the results of any changes, click on the Apply button to update the preview window.
Predefined Frame Styles
As you click on the frame image on the left, the frame is activated and the current or next image in your image list is used to give you and example of how your framed image will look. The same frame is also used for your custom Calendar Maker dialog. Note: if you have NOT registered your copy of PhotoMazing, you will be restricted to using only the PMDEFAULT frame from the list below.
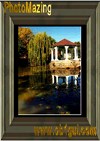
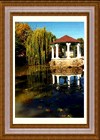
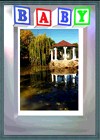
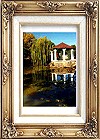
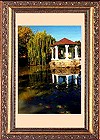
A larger preview of each frame with a sample picture is shown in the table below.
 |
 |
 |
 |
 |
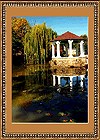
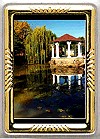
| PMDEFAULT | PANEL | BABY | CHERRY | FLATSCREEN |
 |
 |
 |
 |
 |
| GAUDY1 | GAUDY2 | GAUDY3 | WEDDING1 | WEDDING2 |
Main Dialog Buttons